Projects — make
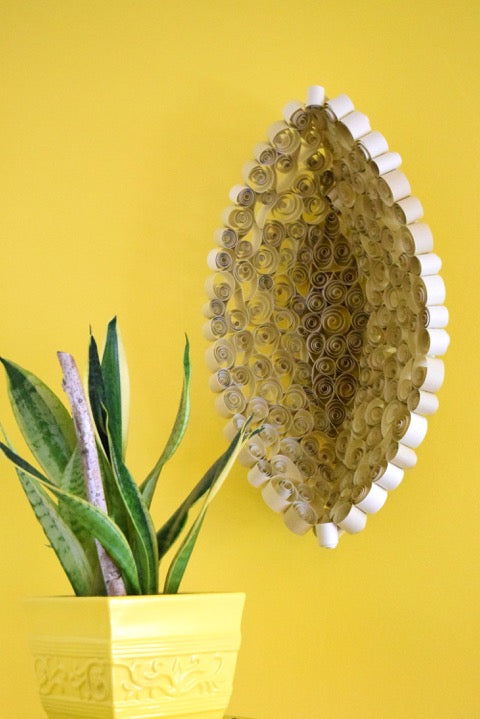
Quilled Wall Art
Adhesive Aleenes craft Crafts crafty decorate DIY handmade Home how-to ideas instructions make PattieWack PattieWilkinson Projects Quilled Wall Art step-by-step supplies Tacky
Quilled Wall Art This wall art made with simple quilling techniques will be beautiful displayed in your home. The paper strips are 1-inch wide, and create a very dramatic statement when formed around a bowl, glued together, and hung against a brightly colored wall. Step 1: Gather Supplies – Large Bowl 12” x 12” Scrapbook Paper Plastic Wrap White Craft Glue Step 2: Cut 1” strips from the scrapbook paper. Step 3: Cover bottom of the bowl with plastic wrap to protect when gluing. Step 4: Create coils, beginning in the center bottom of...
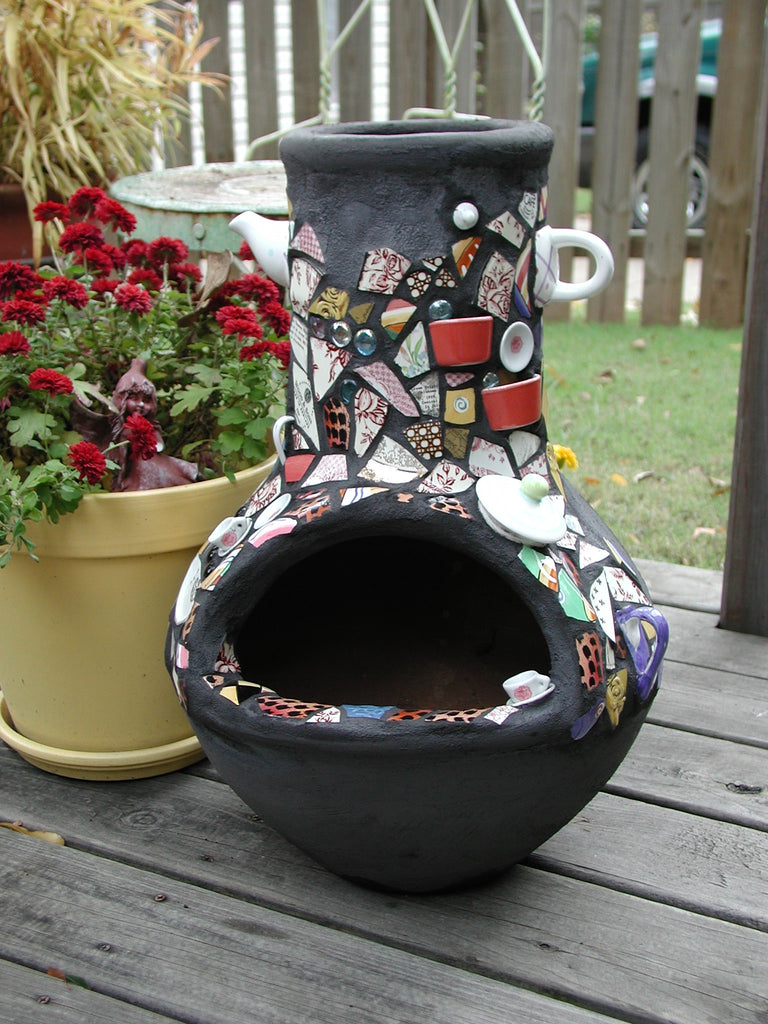
DIY Mosaic Chimenea
Aleenes ceramics chic DIY chimenea Crafts crafty decorate DIY easy embellish handmade Home how-to ideas instructions make Make It mosaic PattieWack PattieWilkinson Projects step-by-step tea set
Turn a chiminea into a fountain, covered with broken dishes. A miniature tea set added to the design gives it a surprisingly unexpected whimsical touch. Supplies: Chiminea Broken ceramic and china dishes Miniature tea set Aleene’s® Liquid Fusion Glue Grout Sponge & water Hammer Drill Fountain pump Clay pot (sized to turn upside down in the chiminea) Sealer & brush Steps: Seal the inside of the chiminea to enable you to add water for the fountain. Let dry. Drill a hole in the back of the chiminea above water lever, for the cord to pull...
Make Beautiful Foiled Glass Jewelry!
Crafts crafty decorate DIY jewelry easy embellish Gifts handmade how-to ideas instructions make maker PattieWack PattieWilkinson Projects step-by-step supplies tools
All you need is PattieWack Foiling Glue and Silver or Gold Foil to create these charms for jewelry making! The PattieWack™ Foiling Technique is a quick and easy way to add metallic effects to any craft project such as Paper, Wood, Plaster, Bisque, Paper Mache, Metal, China, Glass. It is easy to use with PattieWack™ Foiling Glue adhesive that remains tacky after drying until clear. Or you can apply foil to any double-sided adhesive tape! Apply crafting foil with the shiny side up, pressing and rubbing into the sticky surface with fingers. Peel away the foil, leaving the shiny metallic...
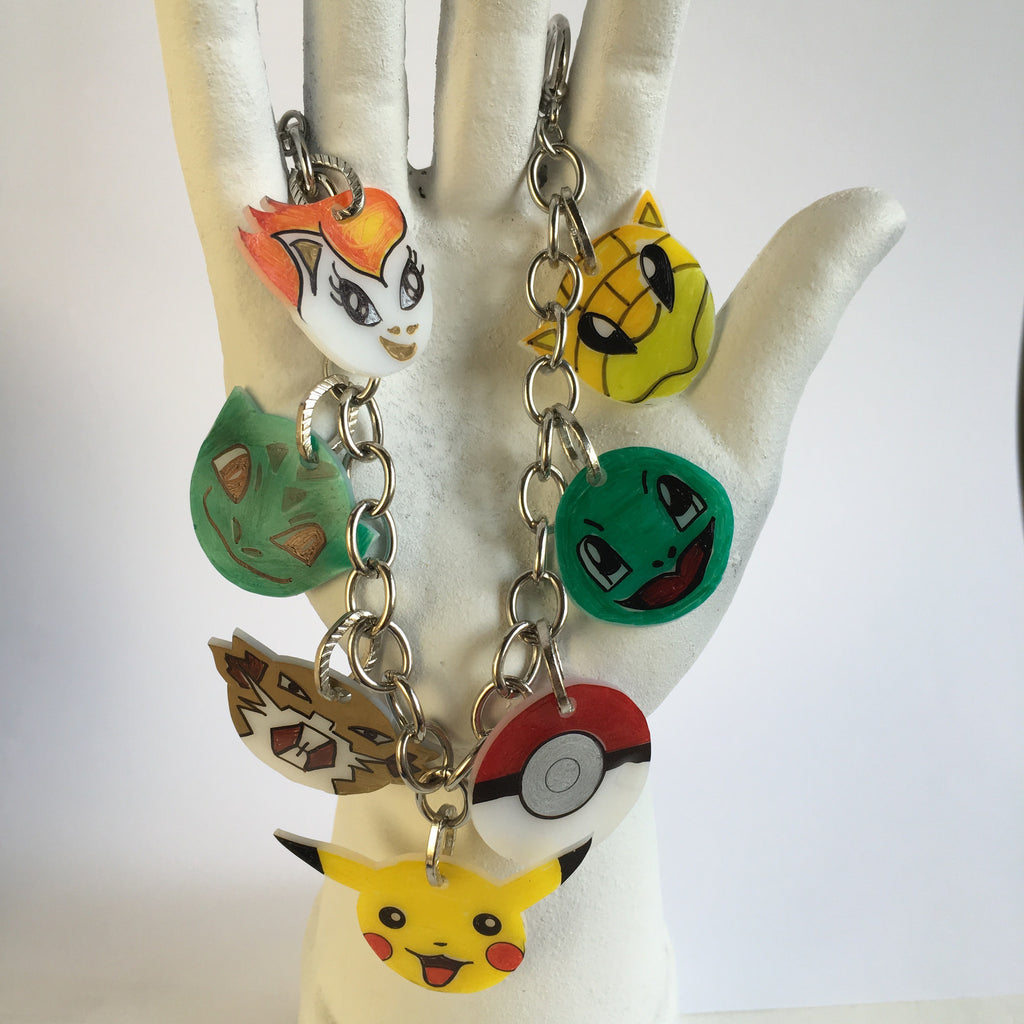
Pokemon Go - DIY Shrink Plastic Bracelet
DIY DIY jewelry Fashion how-to ideas instructions jewelry making make maker PattieWack PattieWilkinson Pattywack POKEMON GO Projects Sharpies Shrink Art Shrink Plastic Shrink-it Shrinky-Dink Shrinkydinks step-by-step supplies
Create a bracelet with PattieWack™ Shrink Plastic and make it for the Pokemon Go enthusiast! Step 1 - Place a sheet of clear PattieWack™ Shrink Plastic over the FREE Pokemon pattern (at the end of this post). Trace pattern with black permanent marker. Step 2 - Color inside the traced lines with colored permanent markers. Step 3 - Cut out the Pokemon images with scissors. Step 4 - Punch holes with 1/4" hole puncher. Be sure and do this step, so your Pokemon charms can be attached to your bracelet! Step 5 - Shrink charms with heat gun, on a...
How-To Make Pom-Pom Pens!
craft Crafts crafty crochet DIY easy Gifts handmade how-to ideas instructions knit make pens Pom-Poms pompom Projects step-by-step supplies tools yarn
Pompom Pens are the perfect idea for Christmas gifts, and I've been working like crazy on pompom goodies to sell in our iLoveToCreateChristmas boutique next week. My stash of yarn has been so great for all of these projects since they don't need to match each other, but they are so pretty with mixed bits of yarn in coordinating colors, don't you think? These are super quick to make and would be just the ticket for office gifts or stocking stuffers. It only takes about 15 to 20 minutes to make one, and nobody will walk away from your desk...


