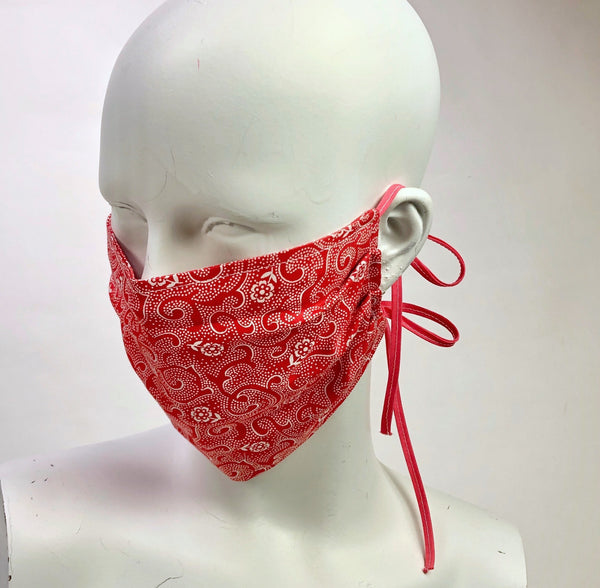
Full Tutorial:
How-To Sew a Face Mask 2 Different Ways
For the latest information on Use of Cloth Face Coverings to Help Slow the Spread of COVID-19, go to the CDC (Center for Disease Control) which is updated daily:
https://www.cdc.gov/coronavirus/2019-ncov/prevent-getting-sick/diy-cloth-face-coverings.html
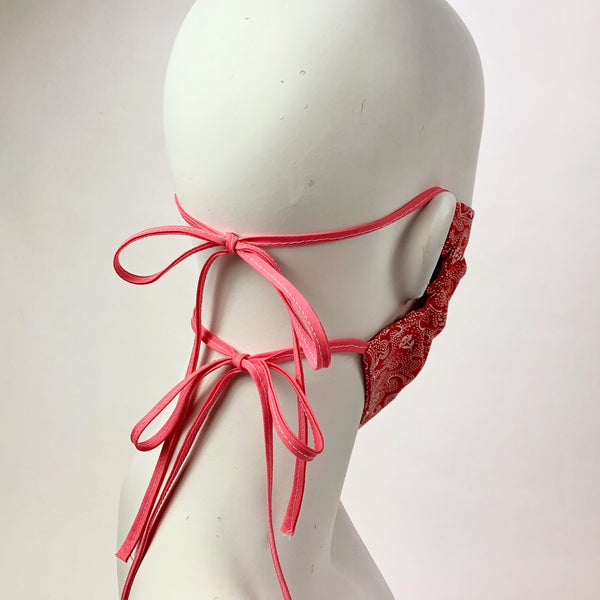
The first TUTORIAL is How-To Sew a Tie-On Mask, made with strings that can be made with bias tape or you can make ties with the same fabric as the mask.

The second tutorial is How-To Sew an Elastic Band Mask, made with elastic that goes around your ears.
Please note that elastic cannot be bleached and therefore, not as easy to clean and anyone with a latex allergy cannot wear it. Also elastic is increasingly in short supply. In fact, I couldn't find any and had to use what I had, which was a little wider than the 1/4" elastic.
Another alternative to elastic is to cut up an elastic headband and use instead of elastic.

The elastic bands can be shortened or lengthened according to the size you need. I found that 7" elastic bands work for men and 6" elastic bands work for women.

Both masks are easy to make!
You can make a mask in 15-30 minutes, depending on your experience as a sewer. And if you are a fabric hoarder, or quilter, or just love to sew, you probably already have everything you need to make several masks for yourself and to share with others.

First, you'll need 100% cotton fabric. Cotton can be laundered in hot water, and bleached to get rid of germs.
If you don't have a stash of cotton fabric, you will find that Fat Quarters, or 1/4 yard cuts of cotton fabric are easy to find on the internet, and come in beautiful colors and prints. You can make 2 masks from a fat quarter if you are making these 2-layer masks. If you add another layer, you will be able to make 1 mask from a quarter yard of fabric. 
MATERIALS NEEDED FOR TIE-ON MASK:
(2) 10" x 7" Cotton Fabric Pieces (Cut 3 pieces for 3 layers)
72" Bias Tape (You may substitute flat shoelaces.)
Sewing Machine (You can hand-sew if you don't have a machine.)
Scissors or Rotary Cutter & Cutting Board
Ruler or Measuring Tape
Pins or clips to hold fabrics in place (Paper clips and safety pins will work in a pinch.)
Iron

Step 1 - Cut out 2 pieces of fabric 7" x 10"

Step 2 - Cut 4 strips of bias tape, 18" long.

Step 3 -Sew the bias tape strips down the center to create ties.
Step 4 - Pin the ties to each of the corners on the right side of one of the fabric pieces. 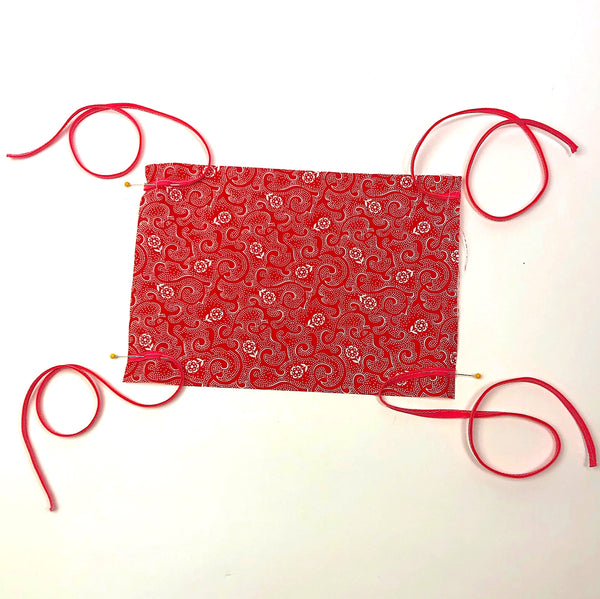
Step 5 - Sew the ties in place.
Step 6 - Pin the second layer of fabric over the first layer, right sides facing, sandwiching the fabric ties in the center. Sew a 1/2" seam around all 4 sides, leaving a 3-inch gap on one side. Back stitch at the beginning and end of the stitching to secure. Trim the excess fabric at the corners.
Step 7 - Turn the mask right-side-out, through the 3-inch gap. The ties will now stick out from each corner. Press with an iron.
Step 8 - Pin three 1/4" pleats lengthwise on the mask, as if folding a paper fan. This will help the mask fit snuggly around the wearer's face. 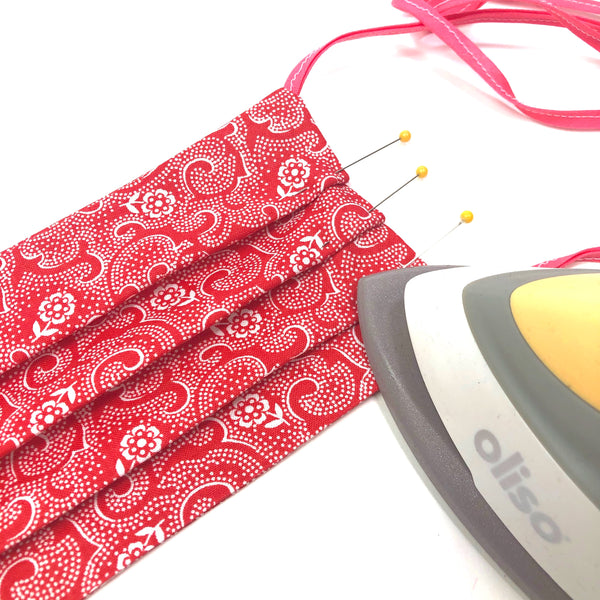 Step 9 - Iron the pleats in place.

Step 10 - Sew a 1/4" top-stitch across the pleats, and on all 4 sides of the mask.
And there you have it!
Tie-On Mask is completed in 10 easy steps!

How-to Make an Elastic Band Mask
MATERIALS NEEDED FOR ELASTIC BAND MASK:
(2) 10" x 7" Cotton Fabric Pieces (Cut 3 pieces for 3 layers)
(2) 1/4" x 7" Elastic Pieces for Male, or (2) 1/4" x 6" for Woman
Sewing Machine (You can hand-sew if you don't have a machine.)
Scissors or Rotary Cutter & Cutting Board
Ruler or Measuring Tape
Pins or clips to hold fabrics in place (Paper clips and safety pins will work in a pinch.)
Iron
 Step 1 - Choose a piece of fabric and elastic.

Step 2 - Cut out 2 pieces of fabric 7" x 10" 
Step 3 - On the right side of on one piece of fabric, pin the ends of the elastic to the corners of the shorter sides as shown in the photo. 
Step 4 - Sew the elastic to all four corners.
Step 5 - Pin the second piece of fabric over the first piece, right sides facing, sandwiching the elastic bands in the center. Sew a 1/2" seam around all 4 sides, leaving a 3-inch gap on one side. Back stitch at the beginning and end of the stitching to secure. Trim the excess fabric at the corners.
Step 6 - Turn the mask right-side-out, through the 3-inch gap. 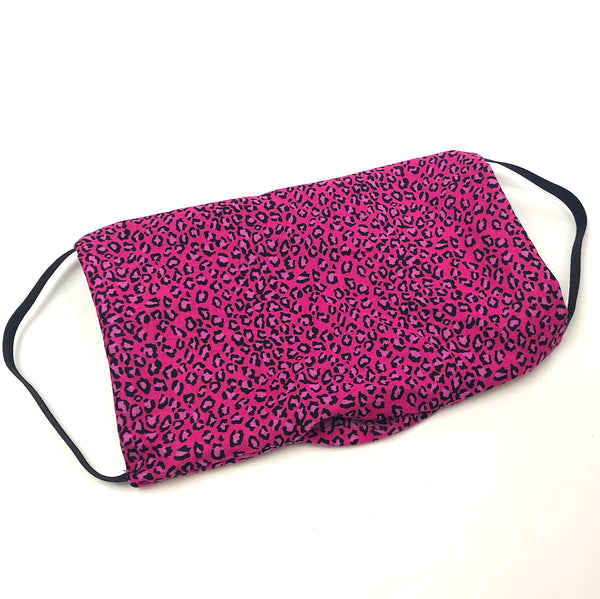
The elastic bands will now stick out from each corner. Press with an iron.
Step 7 - Pin three 1/4" pleats lengthwise on the mask, as if folding a paper fan. This will help the mask fit snuggly around the wearer's face. Sew a 1/4" top-stitch across the pleats, and on all 4 sides of the mask. Press with an iron to hold the pleats in place.

That's all there is to it!
Be sure that you wash the masks on the warmest setting to kill any germs between wearings. And if you are making masks to share, be careful to wash all the masks you make and place directly into a sealed bag before passing them on.
It's nice to have more than 1 mask per person, and launder masks each time you come and go from your home.
CDC on Homemade Cloth Face Coverings:
CDC recommends wearing cloth face coverings in public settings where other social distancing measures are difficult to maintain (e.g., grocery stores and pharmacies), especially in areas of significant community-based transmission.
CDC also advises the use of simple cloth face coverings to slow the spread of the virus and help people who may have the virus and do not know it from transmitting it to others. Cloth face coverings fashioned from household items or made at home from common materials at low cost can be used as an additional, voluntary public health measure.
Cloth face coverings should not be placed on young children under age 2, anyone who has trouble breathing, or is unconscious, incapacitated or otherwise unable to remove the mask without assistance.
The cloth face coverings recommended are not surgical masks or N-95 respirators. Those are critical supplies that must continue to be reserved for healthcare workers and other medical first responders, as recommended by current CDC guidance.
Cloth face coverings should—
- fit snugly but comfortably against the side of the face
- be secured with ties or ear loops
- include multiple layers of fabric
- allow for breathing without restriction
- be able to be laundered and machine dried without damage or change to shape
-
For the latest information on Use of Cloth Face Coverings to Help Slow the Spread of COVID-19, go to the CDC (Center for Disease Control) which is updated daily. You will also find several more ways to make a mask at:
https://www.cdc.gov/coronavirus/2019-ncov/prevent-getting-sick/diy-cloth-face-coverings.html
Please share this post with your friends and loved ones to help
Slow the Spread of COVID-19


